 Relevancy and Engagement
ny.agclassroom.org
The Soil We Grow In
Grade Level
Purpose
Students determine the importance and complexity of the Earth’s soil. Grades K-2
Estimated Time
Materials Needed
Activity 1: Comparing Apples and...Earth?
- Apple
- Plastic knife
- Cutting board or plates
- Paper towels or wet wipes
- Comparing Apples and...Earth? video tutorial
Activity 2: Shake, Rattle, and Roll
For each group:
- Flour
- Sugar
- Water
- Glass jar with lid
- Soil
- Permanent marker
- Ruler
- Paper towels
Activity 3: What's Soil Made Of?
- Soil samples from a variety of locations
- Paper cups with a different soil sample in each, 2-3 per group
- Plastic spoon, 1 per group
- White paper, 1 per group
- Hand lenses, 1 per group
- What's Soil Made Of? handout, 1 per student
Vocabulary
clay: the smallest of the three soil particle sizes; measuring less than 0.002 mm
inorganic: composed of material from nonliving sources; rocks, sand, and minerals are examples of inorganic materials
loam: ideal garden soil that has a well-balanced mixture of sand, silt, and clay
organic: living or once-living organisms; derived from living organisms
sand: the largest mineral soil particles, measuring between 2.00 and 0.05 mm
silt: sedimentary material composed of fine mineral particles in size between sand and clay
Background Agricultural Connections
This lesson is part of the Fun with the Plant Nutrient Team series which was written to help children better understand what the soil needs to be healthy in order to provide us with healthy foods. The lessons encourage students to think for themselves, ask questions, and learn problem-solving skills while learning the specific content needed to better understand the world in which they live.
 The Earth’s soil is a very important resource. Without healthy soil we would not be able to grow the plants we need for food, fiber, and shelter. There are many different types of soil and each is made up of different components, not just dirt! Soil is composed of three different types of particles that are classified as sand, silt, or clay.
The rock material in soil has been broken down over a very long time into smaller and smaller pieces by “weathering,” which happens when rock and soil are exposed to wind, water, and changing temperatures. Water and air are also found in soil. Water, air, and rock particles are the inorganic components of soil, which means these components are not living and never were living. The organic components in soil are living, or were once living, organisms. Examples of organic soil materials include decayed plant and animal waste, worms, insects, bacteria, and more. Healthy soil is a mixture of a variety of inorganic and organic materials.
In this activity you will carefully dissect a soil sample to find out what it is made of. Farmers carry out soil tests like this on a regular basis. Farmers want to know the properties of their soil because it plays a role in the amount of nutrients that are available for plants to use.
Engage
- Ask students, "What is a natural resource?" Allow students time to answer the question. Build upon their answers to teach or clarify that natural resources are substances that occur in nature. Give examples of natural resources such as minerals in the ground, forests, water, and fertile land and soil.
- Ask students, "Where does our food come from?" If needed, give specific examples of food such as an apple, lettuce, corn, etc. Point out that each of these foods grow from plants in the soil.
- Ask students, "Is soil a natural resource?" (Yes)
- Inform students that they are going to be learning about the importance of soil, a natural resource and how important it is to farmers in order to grow and produce the food we eat.
Explore and Explain
Activity 1: Comparing Apples and...Earth?
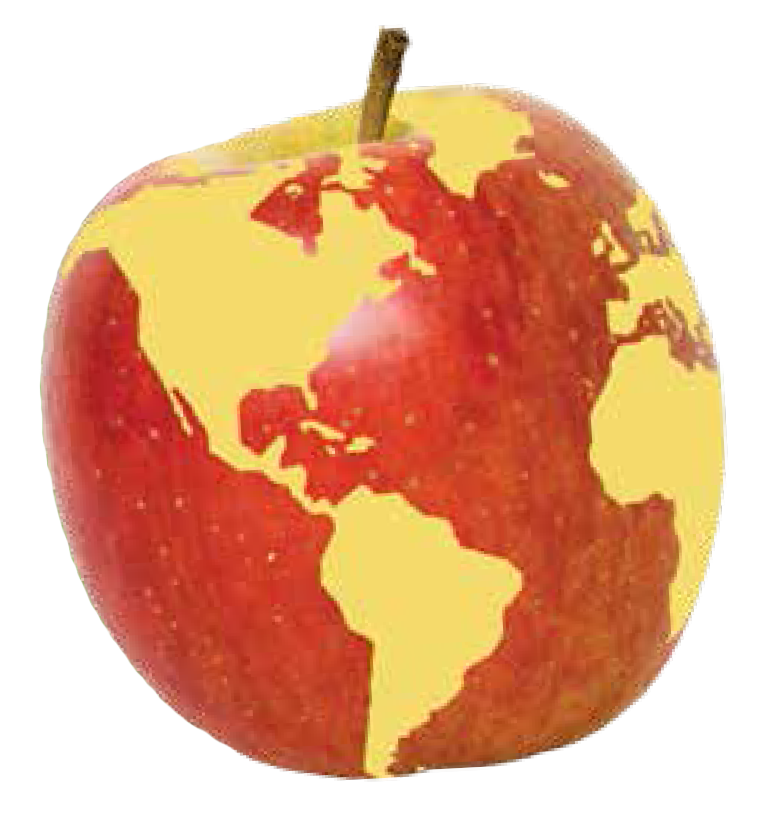
 Hold up an apple to the class and tell the students that it represents Earth.
- Slice the apple into fourths. Set aside three of the fourths, as they represent water on the Earth’s surface.
- Cut the remaining slice in half. Set aside one of the halves as uninhabited deserts, swamps and Arctic areas.
- Divide the remaining piece into fourths. Set aside three of the pieces for land that is too rocky, wet, hot, or poor for crop production.
- The remaining piece is 1/32 of the original apple. Carefully, peel this section. Hold up the peel and explain that it represents the thin layer of soil that is available for producing all of the world’s food crops.
- Have a classroom discussion using the following questions:
- What is the key message underlying the activity?
- What actions can students take to care for their patch of this precious Earth—as individuals, as a class and school, with their families, in their community?
- How are farmers stewards of the land?
- What is sustainability? Introduce the concepts without using the word itself, which can be difficult to define. Produce concept maps based on discussion.
- How do natural resource management, farming techniques, feeding the world, land care, and environmental management play a role in food production in your hometown and state?
Tips:
- A demonstrator could cut one apple and students eat an approximate amount
- Watch the tutorial video, Comparing Apples and... Earth?
Activity 2: Shake, Rattle, and Roll
- Explain to the class that soil is made of three different types of particles: sand, silt and clay. The perfect soil will contain an even mixture of all three. This is called a loam soil.
- Give each student a small sample of sugar, representing sandy soil. This soil does not usually grow plants well, as it dries out quickly and does not let the roots get enough water. Have the students describe the texture. Next, allow students to feel a small sample of dry flour and rub it between their fingers. This is the powdery, silky texture of silt. Finally, add a small amount of water to the flour. This is the texture of clay. Clay particles clump together and compact when dry and drain poorly when wet. Have the students describe the texture.
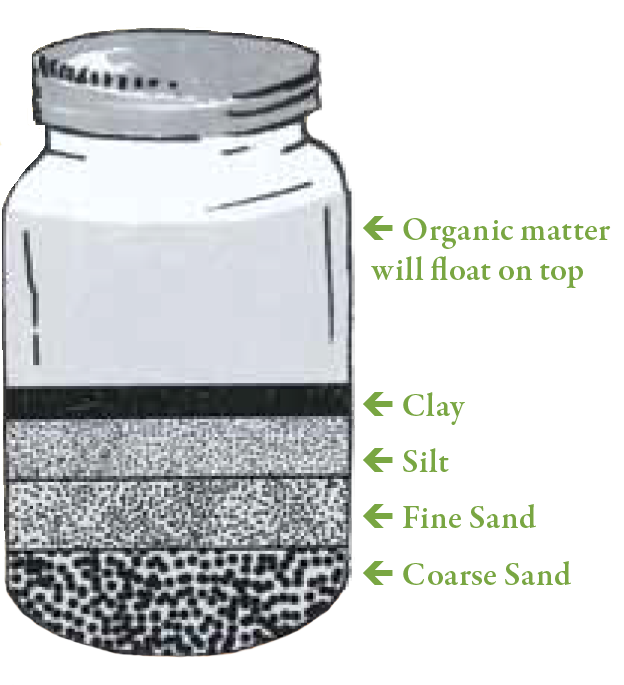
- Determine the type of soil in the garden by filling a large jar half-full with soil. Fill the
 remaining space with water. Have the students take turns vigorously shaking the jar until the larger clumps are broken apart. Let the jar sit for two minutes. Use a permanent marker to draw a line to mark each layer. Allow at least 24 hours for the soil to settle completely. The top layer will be clay, which includes the smallest, lightest particles. The middle layer will be silt, and the heaviest particles fall to the bottom, sand. Have the students identify the thickest layer to determine the soil type.
 - Have students measure and graph the separate layers in centimeters. Divide the class into groups to duplicate the activity with soil from different areas of the campus. Students can record, graph and compare their findings. Ask the students how this activity might influence where they plant a garden.
Activity 3: What's Soil Made Of?
- Gather samples of soil from a variety of places around your school or home garden. You can also have the students bring samples of soil from home. Do not use purchased potting soil for this activity.
- Divide soil samples into paper cups, with two to three different soil samples for each student group.
- Distribute the student handout, What’s Soil Made Of? and read as a class. Demonstrate the procedure for the class, then divide students into groups. Walk younger students through each soil sample one at a time as a class.
- Instruct one student from each group to obtain cups of soil samples.
- Use the questions that follow as a class discussion for younger students. Have the older students complete the answers to the questions in their groups. Discuss why it is important for farmers to understand the properties of the soil on their farms.
- Note: This lesson uses various models to illustrate concepts. Remind students that models incorporate approximations that may not represent the exact properties of soil.
Elaborate
-
Complete the activities on pages 4, 16, and 23 from the Fun With the Plant Nutrient Team Student Activity Book.
Evaluate
After conducting these activities, review and summarize the following key concepts:
- Soil is a natural resource.
- Fertile soil that can be used to grow our food is a limited resource and it has value.
- Soil is important to farmers who grow our food.
Acknowledgements
The Educator’s Guide was funded by California Department of Food and Agriculture’s Fertilizer, Research, and Education Program (FREP) and developed by California Foundation for Agriculture in the Classroom.
Executive Director: Judy Culbertson
Illustrator: Erik Davison
Layout and Design: Nina Danner and Renee Thompson
Copy Editor: Leah Rosasco
Special Thanks to: Nutrients for Life Foundation, International Plant Nutrition Institute, Fertilizer Research and Education Program, and California Department of Food and Agriculture.
Recommended Companion Resources
- A Handful of Dirt
- Dirt: The Scoop on Soil
- Fun With the Plant Nutrient Team Student Activity Book
- Indoor Gardening Curriculum
- Planters and Cultivators: with Casey and Friends
- Soil Health Education Resources
- Soil Painting
- Soil Science Society of America
- Soil, Not Dirt
- The Dirt Book: Poems About Animals That Live Beneath Our Feet
- Under Your Feet: Exploring Soil Science
- Under Your Feet: Soil, Sand and Everything Underground