Agricultural Literacy Curriculum Matrix
Lesson Plan
Cooking Right: The Science of Cooking a Hamburger (Grades 6-8)
Grade Level
Purpose
The teacher will demonstrate cooking hamburgers to different temperatures. Students will analyze Petri dishes inoculated with hamburger and observe the amount of bacteria at each temperature. They will also learn that cooking hamburgers to the recommended temperature of 160° F (71° C) will kill pathogenic bacteria. Hamburger is used for this cooking lab because it’s a food that students are familiar with and may be cooking at home. Grades 6-8
Estimated Time
Materials Needed
For Cleaning and Disinfecting
- Dishwashing detergent
- Disinfecting bleach solution (20 ml of liquid household bleach in 1 L of tap water)
- Alcohol wipes or cotton balls and isopropyl alcohol
- Paper towels
For Preparing and Cooking Hamburger
- .5 pound (227 grams) of inexpensive, raw hamburger, such as chuck (enough to make 4 patties, approximately 50 grams each — do not use pre-molded hamburgers)
- Metric ruler
- Scale for weighing the hamburgers
- Hot plate and a regular skillet
- Non-stick spray to keep the hamburgers from sticking to the pan during cooking
- 1 digital, instant-read food thermometer (rapid-read, thin-probe type is best)
- Sharp knife
- Spatula for removing hamburgers from skillet
- Clean paper plates for cooked hamburgers
For Swabbing Petri Dishes
- 5 sterile Petri dishes with nutrient agar and covers
- Parafilm to seal dishes
- Sterile cotton swabs
- Permanent marker
For Safety
- Thermal gloves or hot pads for handling the hot skillet
- Safety gloves, safety goggles, lab aprons for anyone handling and/or cooking meat
 Advance Preparation
- Review Demonstration Lab Sheet: Cooking Right to prepare for class demonstration.
- Purchase hamburger.
- Prepare 5 sterile Petri dishes containing nutrient agar.
- Familiarize yourself with the proper use of a food thermometer.
- Review information in the Background Agricultural Connections section of the lesson
- Make one copy of the Demonstration Lab Sheet: Cooking Right for each student (optional).
- Prepare 1 hamburger patty (approximately 50 grams) to cook as students enter the classroom.
- Note: This lab is designed as a teacher demonstration. If you prefer, and your school allows students to handle and cook raw meat in the lab, you can have students conduct the lab. (See the Teacher’s Guide for High School Classrooms, pages 68-70.)
Vocabulary
food safety: the practice of handling, preparing, and storing food in a way that prevents food-borne illness
Did You Know?
- Research done by the U.S. Department of Agriculture shows that 1 out of every 4 hamburgers turns brown in the middle before it is safely cooked. Some ground beef patties look done at internal temperatures as low as 135° F (57° C).
- Less than half the U.S. population owns a food thermometer … and only 3% use a thermometer when cooking foods such as hamburgers at home.
Background Agricultural Connections
Hamburgers are a staple in the diet of many teenagers. Knowing how to cook them to a safe internal temperature to prevent foodborne illness is important.
 It’s particularly important to cook ground meats such as hamburger thoroughly, because there’s a greater chance for bacterial contamination with ground meat than with whole cuts. The bacteria start out on the outside of the meat. When the meat is ground, any bacteria that were originally on the outside can be distributed throughout the hamburger. In addition, when making patties, harmful bacteria from hands, utensils, and surfaces can be transferred to the inside of the hamburger patty. It’s important, therefore, to make sure that the internal temperature of the hamburger has reached a safe internal temperature (160° F [71° C]) to kill foodborne pathogens that may be present.
An “instant-read” dial food thermometer with a probe in the tip is best for checking the proper temperature of hamburgers. The probe should be inserted in the side of the burger, so the entire sensing area (usually 2 to 3 inches [5 to 8 cm]) is positioned into the center of the burger.
It may not always be possible to check the hamburger with a thermometer – for example, when you’re eating in a restaurant. In this case, the safest thing is to ask for the hamburger to be cooked to a temperature of 160° F. Send it back if it’s pink in the middle, although keep in mind that the color of the meat is not an accurate indicator of whether it reached a safe internal temperature.
 Science and our Food Supply
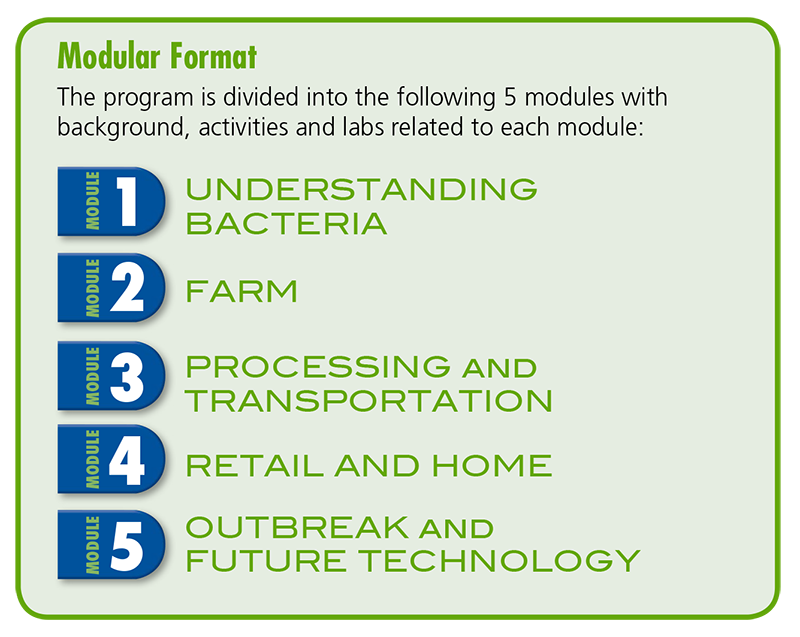
This lesson was developed as a portion of an entire unit of lessons focusing on food safety from farm to table. Use the following links to see the remaining lessons:
Module 1: Bacteria
Module 3: Processing and Transportation
Module 4: Retail and Home
- Supermarket Smarts
- Cooking Right: The Science of Cooking a Hamburger
- A Chilling Investigation
- Crossed Up!
- Hands Off, Bacteria!
Module 5: Outbreak and Future Technology
Evaluation: Lose a Million Bacteria (The Game)
Engage
![]()
- Have a hamburger cooking as students walk into the room. Ask students, "How do you want your hamburger cooked — well done, medium, or rare?" Take a tally of the class. Now ask, "Why?" Let them discuss their reasons for about 5 minutes.
- If no one has mentioned cooking thoroughly so that “it’s safe to eat” or “so you won’t get sick,” ask, "How can you be sure that this hamburger will be safe to eat?" List the students’ answers. Then explain, "Today you’re going to use science to help answer that question. What do you think science has to do with cooking a hamburger? Let’s find out!"
- Explain to the students that most hamburger from the supermarket is safe; however, there is a remote possibility that bad bacteria, such as E. coli O157:H7, can find its way into some foods, like hamburger. Because there’s a possibility that E. coli O157:H7 can be in our hamburger, it’s important to cook all ground meat to a safe internal temperature. In this lesson we’re going to explore the amount of bacteria present in raw hamburger and in hamburgers cooked to different temperatures. Let’s see what happens!"
Explore and Explain
Lab Part 1: Teacher Demonstration with Guided Inquiry
Use the Demonstration Lab Sheet: Cooking Right as a guide for conducting the lab. Use the following suggestions for guided inquiry to help students analyze and design the experiment as you demonstrate.
- Ask volunteers to assist you in labeling 5 Petri dishes: control, raw, 120° F (49° C), 140° F (60° C), 160° F (71° C); see the attached Lab Procedures sheet for more details.
- Demonstrate how to set up a control dish.
- Show students how to swab the raw hamburger, inoculate the “raw” dish, and seal the dish with Parafilm.
- Ask students:
- "What factors should be considered as we conduct this lab?" (Weight, size, thickness of hamburgers, temperature, consistency, etc.)
- "How can we assure that all the hamburgers are the same size?" (They should be weighed.) "Why?" (If the hamburgers vary in size, another variable is introduced.)
- "Does thickness of the hamburgers matter?" (Burgers should be about .5 inches [1.3 cm] thick. It’s easier to accurately insert the thermometer in a burger of this thickness.)
- Demonstrate how to prepare 3 hamburgers — weigh and measure them to assure that they are all the same weight and thickness.
- Option: Have student volunteers make, weigh, and measure the hamburgers. Make sure students wear safety gloves and follow safety procedures for handling raw meat.
- Cook one hamburger to 120° F (49° C). Ask students:
- "Why is it important to take the hamburger out of the pan to measure the temperature?" (The heat from the pan will interfere with getting an accurate temperature reading of the inside of the hamburger.)
- "How should you take the temperature?" (Take the temperature through the side and into the center, making sure the temperature probe reaches the center of the burger, not just the outer edge. Follow the instructions on the thermometer package.)
- Clean the thermometer with alcohol after every temperature reading. Ask:
- "Why is this necessary?" (If there are bacteria in the meat, they might get onto the thermometer and be transferred to the next hamburger you’re cooking.)
- "What is this called?" (cross-contamination)
- Note: We’re using alcohol to kill any bacteria and prevent cross-contamination in this lab. However, when you’re cooking at home, you can thoroughly wash the thermometer with soap and hot water between uses.
- When the hamburger has reached 120° F (49° C), break it in half and demonstrate how to swab the inside. Ask, "Why do you break it rather than cut it in this scientific test?" (The knife might have bacteria on it and you might transfer that bacteria into the hamburger.)
- Have a volunteer swab inside the broken edge of the hamburger and inoculate the “120° F” dish. Seal the dish with Parafilm.
- Cook the two remaining hamburgers: one to 140° F (60° C) and the other to 160° F (71° C). Have volunteers inoculate the dishes after each hamburger has reached the desired temperature. Seal dishes with Parafilm. Place the inoculated Petri dishes in the incubator at 95° F (35° C) for 1 to 2 days, or let them sit at room temperature for the appropriate amount of time.
Lab Part 2: Observe, Record, and Report
- At the beginning of the next day’s lab, have students observe, record, and report bacterial numbers in the 4 samples. Ask students to discuss:
- "Which temperature produced the most effective results in reducing bacterial numbers?" (The temperature of 160° F [71° C] should show the best results. This is the recommended temperature for safely cooking ground meat.)
- "How did the amount of bacteria in the raw hamburger compare to the cooked burgers?" (The raw hamburger will have much more bacteria than any of the cooked hamburgers.)
- "What did your control show?"
Elaborate
-
Write a brochure about the importance of food safety precautions and distribute it to the school administrators and groups cooking at sports events, school events, fundraisers, etc.
-
Visit a local fast food restaurant and interview the manager to find out how he/she makes sure the hamburgers are cooked to a safe internal temperature.
-
Prepare a food safety campaign on using a food thermometer when cooking meat, and provide it to your local PTSA or other parent organization.
-
Trace the path of a hamburger from the farm to the table. What does everyone along the continuum do to help assure that the hamburger is free from E. coli O157:H7 when it reaches you? Complete the continuum by indicating where your responsibility begins and what you must do to ensure that the burger will be safe when you eat it. Include each of the 4 Cs of Food Safety in your report.
Evaluate
Concept Elaboration and Evaluation
- What are some things we’ve learned in this lab? Here are some probable student responses, but probe for more:
- Cooking a hamburger to 160° F (71° C) is the only way to tell that a hamburger is safe to eat.
- Temperature should be taken in the center of the hamburger from the side.
- Surfaces used to prepare raw meat must be thoroughly cleaned before preparing other foods on them.
- What are some ways our food can become contaminated after we purchase it? (List students’ responses.)
- Does what we learned about hamburger apply to other foods as well? What about poultry? Fish? Seafood? Eggs? (The general learnings about cooking apply to raw poultry, fish, seafood, and eggs.) For proper cooking temperatures and other information about poultry, fish, seafood, and eggs, see the 4 Cs section of the Food Safety A to Z Reference Guide (pages 52-57) and the Safe Food Chart (pages 62-69).
It’s important to cook meat to a safe internal temperature. The best way to determine if meat is cooked correctly is to use a food thermometer. Hands and surfaces must be thoroughly cleaned before and after coming into contact with raw meat.
Acknowledgements
The Science and Our Food Supply Curriculum was brought to you by the Food and Drug Administration Center for Food Safety and Applied Nutrition and the National Science Teachers Association.
- FDA Education Team Leader Food Safety Initiative: Marjorie L. Davidson
- FDA Science and Our Food Supply Project Director: Louise H. Dickerson
- FDA/NSTA Associate Executive Director and Science and Our Food Supply Program Director: Christina Gorski
- FDA/NSTA Science and Our Food Supply Program Assistant: Jill Heywood
Recommended Companion Resources
Author
Organization
 |
We welcome your feedback! If you have a question about this lesson or would like to report a broken link, please send us an email. If you have used this lesson and are willing to share your experience, we will provide you with a coupon code for 10% off your next purchase at AgClassroomStore. |